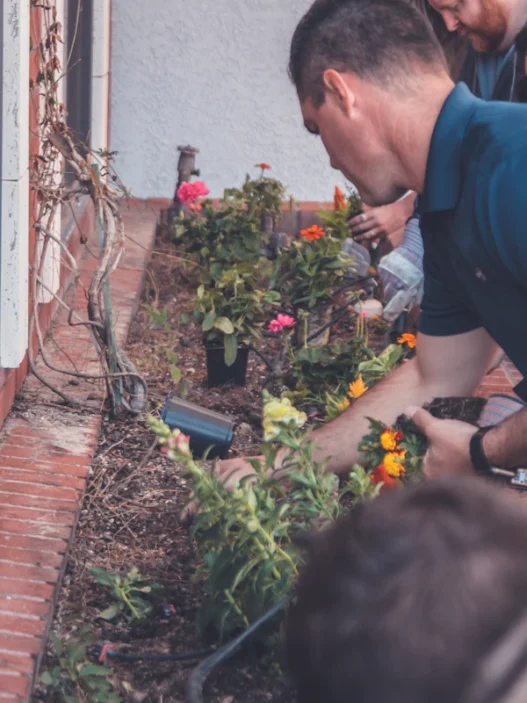


Who says gardening has to be all about pulling weeds and watering plants? Get ready to unleash your kids’ creativity with magical adventures that’ll have than abandoning all their screens to join you in nature! From crafting fairy gardens to building bug boxes, these hands-on gardening projects are known to transform ordinary backyard spaces into wonderlands.
Whether you’re raising future botanists or just looking for screen-free entertainment, these enchanting gardening projects will spark imagination, teach valuable lessons about nature, and create lasting memories. The best part? Most of these activities use materials you already have lying around the house! ????
Create a Fairy Garden ????♀️
Want to sprinkle some magical pixie dust in your backyard? Let’s build an enchanted fairy garden that’ll make even Tinker Bell jealous! This whimsical project transforms an ordinary spot at the base of a tree or a cozy ground hollow into a miniature wonderland that’ll keep your little ones spellbound for hours.
What You’ll Need
- A collection of smooth stones (fairy stepping stones, of course!)
- Twigs for creating itty-bitty fences
- Small plants like ferns, moss, and succulents
- Cardboard or an ice-cream lid (for the fairy door)
- Colorful ribbons
- Fairy accessories (tiny houses, signs, or fairy figurines)
Creating the Magic
First, pick your perfect spot—maybe that mysterious hollow under the oak tree? Start by clearing the area and adding your mini plants. Think like a fairy: They’ll need soft moss for their afternoon naps and delicate ferns for shade on sunny days!
Next, create winding pathways using those smooth stones (fairies love to dance and skip along these!). Use twigs to build adorable fences – they keep the fairy cows from wandering off! ????
The piece de resistance? The fairy door! Transform that simple cardboard or ice-cream lid into a magical portal with paint and decorations. Tie some ribbons to nearby branches – they’re like fairy wind chimes!
Remember, the best fairy gardens grow with imagination. Let your kids add their magical touches – perhaps a tiny mailbox for fairy letters or a miniature garden swing? The more personal details, the more enchanting the space becomes!
Pro tip: Water your fairy garden regularly – happy plants mean happy fairies! And who knows? Maybe you’ll spot some fairy footprints in the morning dew… ✨
Build a Twig Teepee ????️
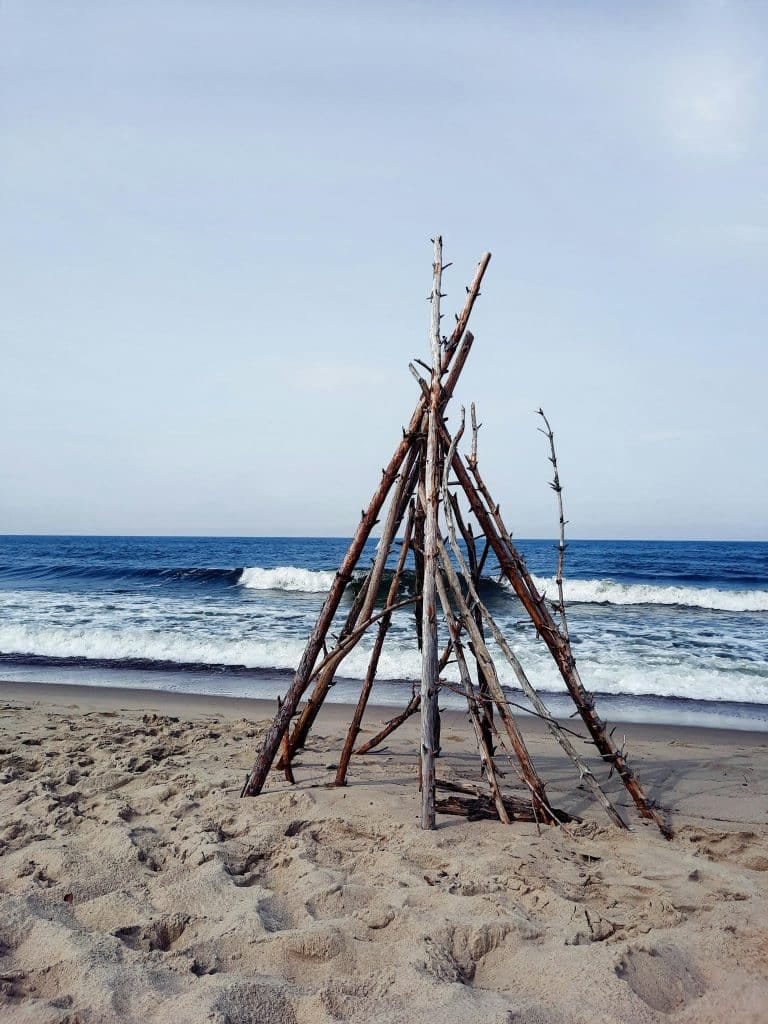
Want to create the coolest hideout in the neighborhood? Let’s make an outdoor teepee that’s part wilderness retreat, part secret clubhouse! This twig teepee project is like building a life-sized Lincoln Log structure (but way more awesome).
What You’ll Need
- Long branches (look for those fancy “V” shaped ones)
- A trusty shovel
- Gardening gloves (because splinters are so last season)
- Your best fort-building enthusiasm!
Building Your Wilderness Palace
Start by channeling your inner architect and drawing a circle on the ground – this is your teepee’s footprint. Think crop circle, but with more purpose! Next, dig small holes around the perimeter for your anchor sticks. These are like the foundation of your forest skyscraper.
Now comes the fun part! Place those V-shaped branches in the holes, leaning them together like they share secrets. Pack the soil tight around each stick – we’re going for sturdy, not wobbly! Layer additional branches between your support sticks until you’ve got walls that would make a beaver jealous.
Remember to leave an entrance—unless you plan on becoming a permanent forest dweller! ???? Make it wide enough for comfortable crawling but small enough to maintain that cozy hideout vibe.
Pro tip: Train some climbing plants to grow up the sides. It’s like adding living wallpaper to your outdoor room! Plus, it gives those wandering vines something better to do than take over your garden. ????
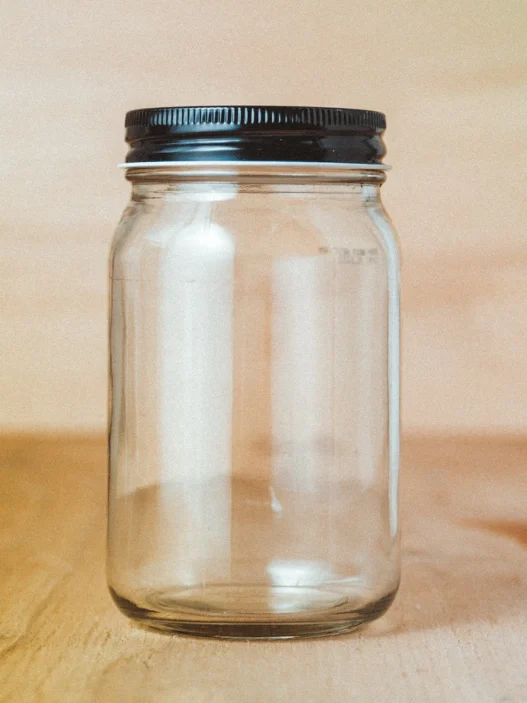
Create a Terrarium Mini-World ????
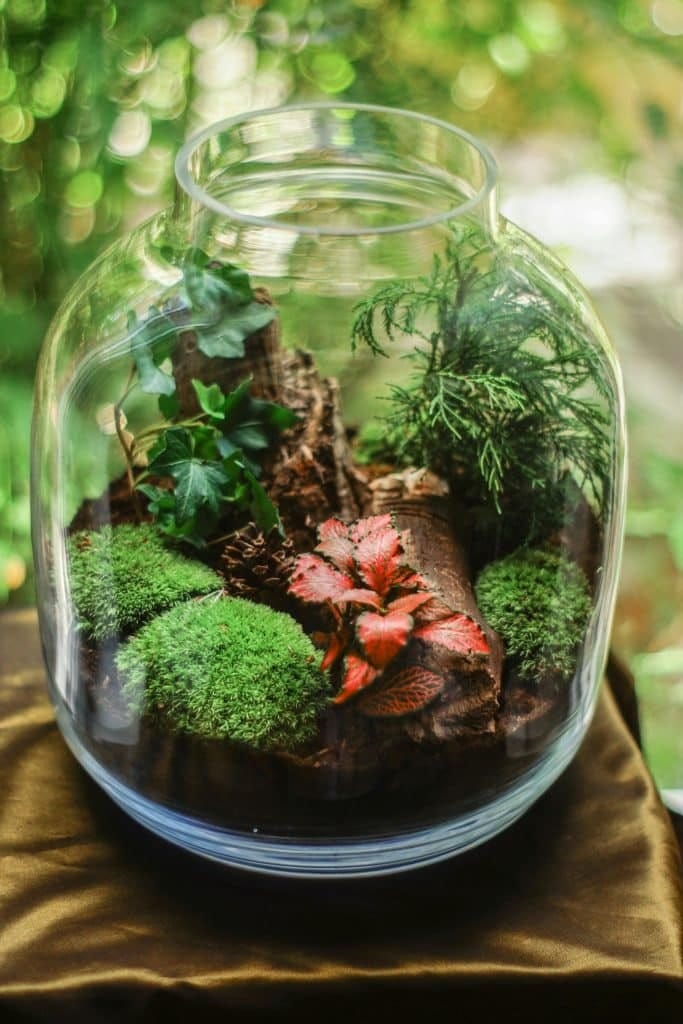
Are you ready to build your own tiny ecosystem in a jar? It’s like creating a miniature Jurassic Park (minus the dinosaurs, but with way cooler plants)! This pocket-sized paradise is perfect for little hands and budding botanists who want to try their green thumbs at gardening.
What You’ll Need
- A large glass jar (the bigger, the better!)
- Gravel (think tiny rock beach for your plants)
- Rich, dark compost
- Adorable succulents (the tough little survivors of the plant world)
- Water (just a splash!)
Building Your Mini Jungle
First, create your foundation by laying down a beach-worthy layer of gravel at the bottom of your jar. This is like building a tiny drainage system for your plants – they hate wet feet just as much as we do!
Next, add a generous layer of compost. Now comes the fun part: planting time! Arrange your succulents like you’re designing a tiny botanical garden. Want that Instagram-worthy look? Place taller plants in the back and shorter ones up front.
Add just a sprinkle of water (succulents are like camels—they don’t need much!), and top it off with a final layer of gravel to lock in the moisture. Think of it as putting a lid on your miniature world!
Pro tip: Place your terrarium on a bright windowsill, but keep it out of direct sunlight – unless you want to create a tiny plant sauna! ????
Remember to chat with your plants occasionally – they might not answer back. Still, they’ll definitely grow better with a little encouragement and love! ✨
Make a Bug Box ????
Have you ever wanted to create a five-star hotel for beneficial garden bugs? Let’s create a spring gardening project that’ll have all the neighborhood creepy crawlies buzzing with excitement! This DIY bug box is like an apartment complex for everything from busy bees to lovely ladybugs.
What You’ll Need
- An open-fronted box (think vintage wine crate chic!)
- A drilled log (solitary bees love these cozy tunnels)
- Pine cones (nature’s perfect hiding spots)
- Stones and broken pots (for that authentic garden vibe)
- Twigs and dried grass (because bugs need bedding, too!)
Building Bug Paradise
Start by turning your box into the ultimate insect resort! Layer different materials like you’re creating a natural bug buffet of habitats. Place your drilled log near the top – it’s the penthouse suite for solitary bees! Stack pine cones in one corner (ladybugs love these), and create little stone caves in another (perfect for woodlice looking for a staycation).
Fill gaps with twigs and dried grass – these make excellent corridors for your tiny tenants to explore. Think of it as creating miniature highways between bug neighborhoods!
Pro tip: Position your bug box in a quiet, sheltered spot facing south or southeast. Our little friends prefer their morning sun with a side of privacy! ????
Remember, a thriving bug hotel means a healthier garden. These helpful insects are like tiny gardeners working 24/7 to keep your plants happy. Watching them go about their busy lives is better than any nature documentary!
Watch your box transform into a buzzing community hub – just don’t expect your guests to sign the guestbook! ????
Plant a Salad Garden ????
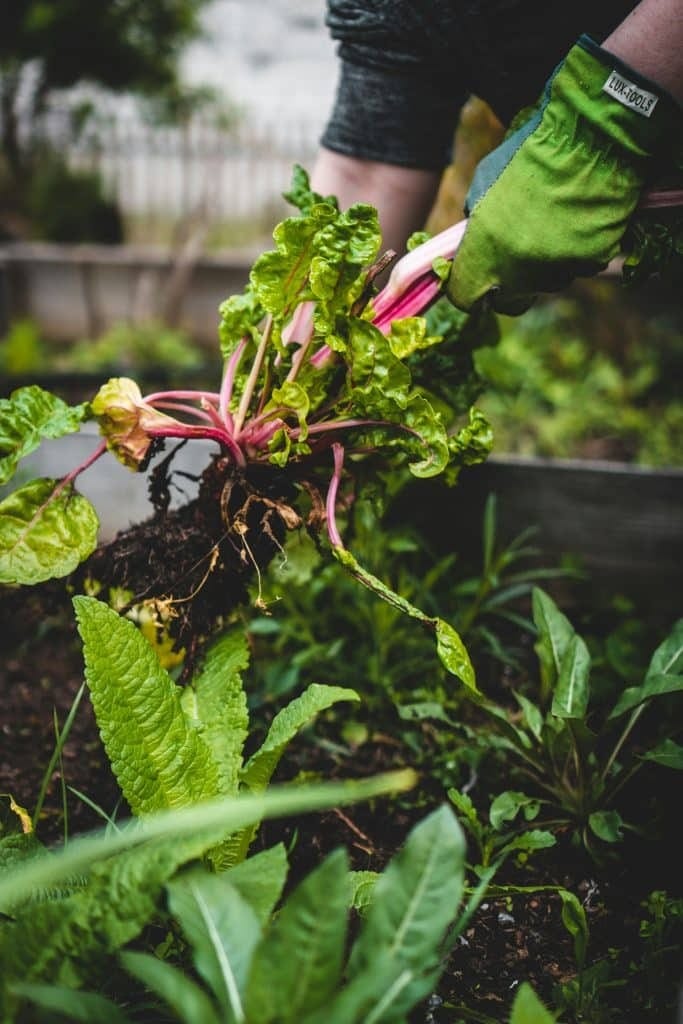
Want to grow your own lunch? Let’s create spring gardening projects right in your backyard! This super-fun project lets kids watch their food grow from seed to plate faster than you can say, “Pass the ranch dressing!”
What You’ll Need
- Mixed salad seeds (the rock stars of quick-growing veggies!)
- Plant pots or containers with drainage holes
- Rich, crumbly compost
- Water (and plenty of patience!)
- A sunny windowsill or garden spot
Growing Your Crunchy Creation
Start by filling your pots with compost, leaving about an inch at the top – think of it as making the perfect bed for your seeds to snooze in! Sprinkle your salad seeds across the surface by adding tiny sprinkles to a cupcake. Don’t go overboard – these little guys need room to stretch!
Cover your seeds with a thin blanket of compost (they’re shy at first!) and give them a gentle shower with water. Place your pots in a sunny spot – these leafy babies love soaking up rays almost as much as beach-goers!
Pro tip: Keep the soil as moist as a chocolate cake – not swimming wet, but never desert dry! Within days, you’ll spot tiny green heads popping up to say hello! ????
In just a few weeks, your salad bar will grow right before you. And the best part? You can keep harvesting the outer leaves while letting the inner ones grow. It’s like having an endless supply of fresh, crunchy goodness!
Remember: Growing your food is like being a kitchen magician—you start with tiny seeds and poof! You end up with a delicious feast! Plus, everything tastes better when you’ve grown it yourself (even those sometimes scary green leaves! ????).
Make Wildflower Seed Bombs ????
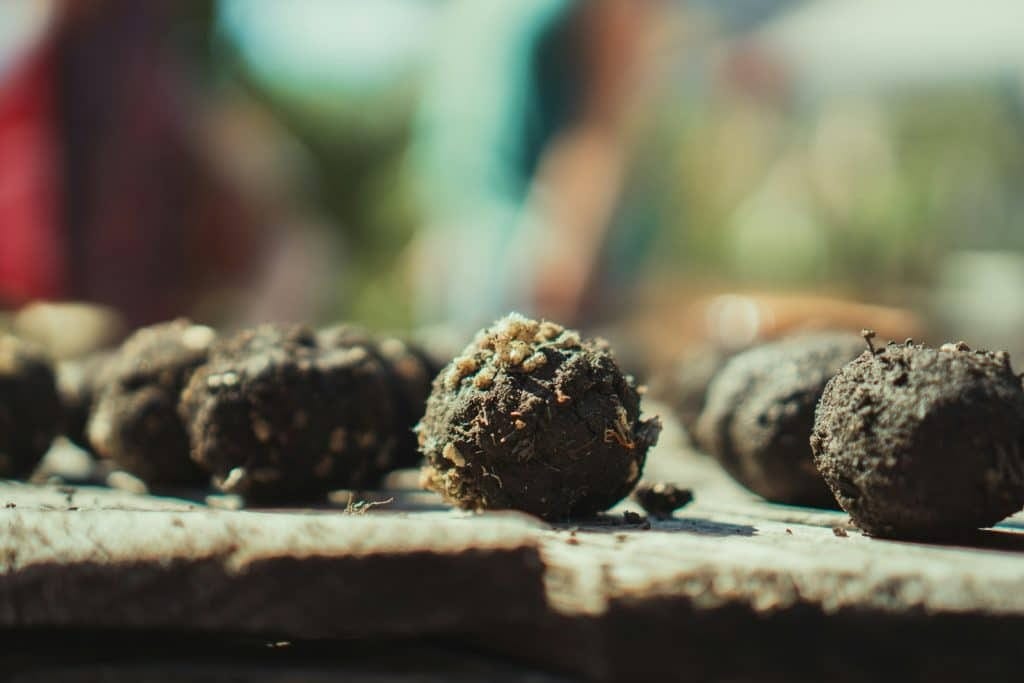
Ready to become a garden guerrilla and spread some floral joy? Let’s create spring gardening projects that’ll transform dull patches of earth into buzzing butterfly havens! Think of these as nature’s confetti – toss them around and watch the magic happen!
What You’ll Need
- Rich, crumbly compost (the good stuff!)
- Plain flour (we’re baking, but not the edible kind!)
- Water (just enough to make things sticky)
- Wildflower seeds (the more variety, the merrier!)
- A dash of the garden warrior spirit
Creating Your Floral Ammunition
Start by mixing your compost and flour in equal parts – it’s like making mud pies, but with a purpose! ???? Add just enough water to create a dough that feels like Play-Doh. Too wet and you’ll have a mess; too dry and your bombs won’t stick together!
Roll your mixture into marble-sized balls (think gumballs for gardens). Then comes the fun part – roll these earthy spheres in your wildflower seeds until they look like tiny disco balls covered in future flowers! Let them dry in the sun for a day or two until they’re firm enough to handle.
Pro tip: Choose native wildflower seeds that local pollinators love – you’re not just growing flowers. You’re creating five-star restaurants for bees and butterflies! ????
When it’s time for deployment, wait for rain in the forecast and toss your seed bombs into neglected garden corners or bare patches. Each bomb is like a tiny treasure chest bursting open with colorful surprises when the rain comes!
Remember: You’re not just making seed bombs – you’re creating future flower festivals! And the best part? Each patch will always look different. It’s like being Jackson Pollock with petals! ✨
Create a Mini Garden ????
Want to be the architect of your own tiny paradise? Let’s create a mini garden that’s bursting with charm and personality! Think of it as creating your own pocket-sized park – complete with all the features of a full-sized garden, just adorably more petite!
What You’ll Need
- A perfect container (anything from a shallow dish to a vintage teacup!)
- Rich, fluffy soil (your mini plants need a cozy bed)
- Small sticks and stones (for those picture-perfect pathways)
- Moss and leaves (nature’s carpet!)
- Tiny flowers and plants (the stars of your mini-show)
Building Your Miniature Paradise
Start by filling your container with soil, leaving some space at the top for your landscaping adventures. Think of it as preparing a blank canvas for your garden masterpiece! Create different levels and hills – even tiny gardens deserve dramatic terrain!
Now comes the fun part – designing your mini world! Lay down those twisty pathways using small pebbles (perfect for imaginary garden strolls). Add stick borders around your “flowerbeds” like tiny picket fences.
Tuck in small plants and flowers, arranging them just so – some tall ones in the back, shorter ones up front, like staging a botanical photo shoot!
Pro tip: Add a splash of whimsy with a tiny bench made from twigs or a miniature birdbath using a bottle cap! These little details make your garden come alive with personality. ????
Remember, the best mini gardens tell a story – maybe it’s a woodland retreat, a fairy’s vegetable patch, or a zen garden for meditation-loving miniature monks! Let your creativity run wild, and remember to water your tiny Eden regularly – even pocket-sized plants get thirsty! ????
Make Hanging Tin-Can Planters ????

Ready to turn trash into garden treasure? Let’s create gardening projects for kids using those empty soup cans from your recycling bin! It’s like giving retired tin cans their dream second career as sky-high plant homes!
What You’ll Need
- Clean tin cans (labels removed)
- Hammer and nail (for making drainage holes)
- Paint in fun colors
- Quality compost
- Plants that love hanging out
- Your artistic spirit!
Creating Your Suspended Garden
First, channel your inner drummer and punch some holes! Create drainage holes in the base of each can (about 3-4 should do it) and a couple near the top for hanging. Just think of it as giving your future plants their rain shower system!
It’s time to get artistic! Paint those cans in whatever colors make your heart sing—maybe polka dots for your petunias or stripes for your succulents? Let your imagination run wild, but remember to use weather-resistant paint. These beauties need to handle Mother Nature’s mood swings!
Once your masterpieces are dry, fill them with compost, leaving about an inch at the top. Plant your chosen green friends – trailing plants work exceptionally well here. Think ivy, tomatoes, or nasturtiums!
Pro tip: Hang your cans at different heights for that Pinterest-worthy look! And remember to water them regularly – plants in containers can get thirsty faster than kids at a summer picnic! ????
Your hanging garden isn’t just beautiful – it’s teaching kids about recycling, plant care, and making something amazing from everyday items. Plus, who doesn’t love a garden that looks floating in mid-air? ????
Make a Bird Feeder ????
Want to turn your backyard into a five-star restaurant for feathered friends? Let’s a create spring gardening project that’ll have the local birds tweeting your praises! Think of it as opening up the coolest breakfast spot in town – but for birds!
What You’ll Need
- Pine cones (nature’s perfect bird feeder base!)
- Creamy peanut butter (the “glue” that keeps it all together)
- Mixed bird seeds (the main course!)
- String or twine (for hanging your avian café)
- A spirit of adventure (and maybe a pair of gloves – things might get messy! ????)
Creating Your Feathered Feast Station
Start by tying a string around the top of your pine cone – think of it as giving your feeder a fancy necklace! Now comes the fun and slightly messy part: spread peanut butter all over your pine cone, getting it nice and deep into those nooks and crannies. It’s like frosting a very woody cupcake!
Next, roll your peanut butter-covered pine cone in bird seeds until it looks like it’s wearing a seed jacket. The more seeds that stick, the happier your bird customers will be! Some might fall off, but that’s okay – think of it as creating a preview of coming attractions for your future visitors.
Pro tip: Hang your feeder where you can watch it from a window, but make sure it’s out of reach of neighborhood cats – we’re running a restaurant here, not a trap! ????
Remember to keep your feeder stocked during winter when natural food is scarce. Soon, you’ll be running the most popular bird bistro in town!
Time to Get Growing!
These fun-filled gardening projects aren’t just about getting dirty hands and creating beautiful spaces – they’re about planting seeds of curiosity, responsibility, and environmental awareness in young minds. Each project offers unique opportunities for learning, creativity, and connecting with nature in ways that will stick with kids long after the last flower blooms.
Remember, the most magical gardens thrive on love, laughter and a hint of imagination! So, grab your supplies, channel your inner green thumb, and watch your little gardeners blossom with their creations. You might spark the next generation of plant whisperers! ????